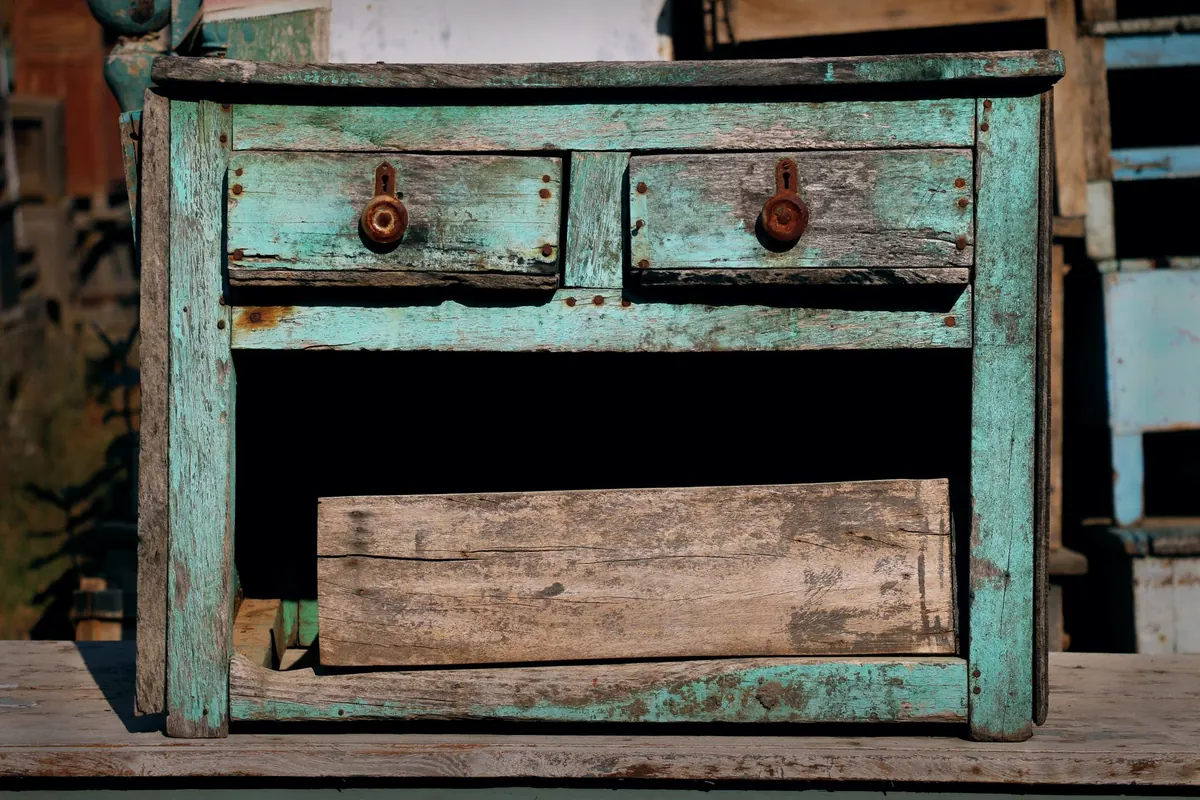
You have seen the photographs: creamy paint rubbed back to bare wood along the corners, a fine web of crackle across a drawer front, a finish that looks like forty years of Sunday dinners and muddy boots. Then you try it on a dresser you actually like, and it looks like it lost a fight with a belt sander. The gap between the two is rarely talent. It is a short list of habits, and most of them are easy to correct once you can name them.
These are the seven mistakes that turn up again and again on rustic paint jobs, along with the fix for each one.
Over-sanding is the most common error and the least reversible. Preparation has one job: give the paint something to grip. It does not need to look freshly milled. Stop at 120 or 150 grit on bare wood. Sanding to 220 and beyond burnishes the surface, closes the grain, and leaves paint sitting on top of a slick panel where it lifts in sheets later.
Veneered pieces are where this gets expensive. Many veneers are thinner than a sheet of card stock, and one careless pass with 80 grit on an orbital sander can cut straight through to particleboard. Work by hand, with the grain, and check with your fingertips rather than your eyes. If the wood feels like glass, you have gone too far.
Do not try to rebuild an edge with filler; it will show. Instead, lean into the damage. Those rounded, glassy corners can carry heavier distressing than the rest of the piece, sanded back with a 220-grit sponge so the bare wood reads as years of use rather than a mistake. To restore some tooth, scuff the flat areas lightly with 150 grit before priming.
Colour is the fun part, but rustic finishes live or die on how a paint chips, sands and powders. The same sanding block behaves differently on each type.
Stick to flat, matte or eggshell. On a piece with a glossy or oil-based finish, no paint will bond reliably until you scuff it with 150 grit and apply a bonding primer. And read the cure time: many water-based paints feel dry in an hour but keep hardening for days, which matters in the next section.
Kitchen dressers, side tables that lived near a candle, and anything that has been polished with a silicone furniture spray carry a film you cannot see. Sand that film and you grind it into the grain, where it quietly repels paint for months.
Wash the whole piece with warm water and a degreaser, or wipe it down with denatured alcohol or mineral spirits, then let it dry completely. If the piece has been heavily waxed, a solvent wipe may not shift all of it; scuff the surface and use a shellac-based primer. Test in an inconspicuous spot first. On older pieces, be cautious with dry sanding, since some pre-1970s finishes should not be sanded without testing for lead — check with a test kit and follow your local disposal rules.
Timing decides whether the paint chips or smears. Distress too early and the paint balls up under the sandpaper and drags across the surface in greasy streaks. Wait too long, until the paint has fully hardened, and the chips look like damage rather than age — sharp, brittle, oddly clean.
The sweet spot is when the paint is dry to the touch but not yet cured, often the next day for water-based furniture paint. Do all your repairs, filling and assembly first. And decide early whether you are sealing the piece, because every scrape and rub you make will be locked in under that topcoat.
Uniform distressing is the giveaway. If every edge is worn to the same width and every corner rounded the same amount, the eye reads it as a technique rather than a history. Real wear follows use.
Think about where hands and shoes actually go:
Vary your pressure and your tools. Folded 120 grit for long, faint rubs. A sanding sponge for soft, wide wear. A card scraper for a few chipped lines. A short length of chain or a can of screws shaken over the surface for dents and speckles. A barely damp rag pressed over slow-drying paint will lift it in soft patches. Then leave some areas completely untouched, because a piece that is worn everywhere is worn nowhere.
A rustic finish is mostly exposed wood and bare edges, and that is exactly where moisture, grease and rings from a cold glass get in. Chalk-style paint with no topcoat will mark if you look at it firmly. The topcoat is not optional decoration; it is what keeps the piece usable.
The one rule that trips people up: never apply a water-based topcoat over wax. Nothing will adhere, and it will crawl and peel. If you have already waxed the piece, either stay with wax over wax, or strip the wax with mineral spirits before switching.
Paint a scrap of similar wood, distress it, topcoat it, and leave it on the bench for a day. Look at it in daylight, not under a workshop bulb, and try a scratch with a fingernail. That offcut will tell you more than any photograph. Start your real distressing on the back panel, the underside of a stretcher, or the inside of a foot — never on the front of a drawer.
In the end, most of these mistakes come from hurrying two things: preparation and drying time. Sand less than you think you should, wait longer than you want to, and test on wood that does not matter. The piece will look like it earned its wear.
Photo: ritik kothari / Pexels
Spot genuine antique cottage furniture by reading the wood, joinery, patina, hardware and price — and learn the...

Choose the right herbs, prep a box that drains properly, and a windowsill can supply fresh leaves all winter — even...

Two pantry-friendly methods — stovetop simmer pots and homemade linen sprays — fill a cottage with warm bakery...

Cozy cottage living, decorating, and inspiration.